Introduction :
Stripe Connect is a powerful tool for managing payments in multi-sided marketplaces, platforms, and other applications that need to facilitate payments between third-party users. Integrating Stripe Connect with Bubble.io enables you to handle complex payment scenarios seamlessly. This guide will walk you through the process of setting up Stripe Connect in your Bubble.io application.
1. Create a Stripe Account
- If you haven’t already, sign up for a Stripe account at stripe.com. Once your account is set up, navigate to the Dashboard to manage your API keys and account settings.
2. Set Up Your Bubble.io Application
- Log in to your Bubble.io account and open the project you want to integrate with Stripe Connect. If you don’t have a project yet, create a new one.
3. Install the Stripe Plugin

- In your Bubble.io editor, go to the “Plugins” tab on the left sidebar.
- Search for the “Stripe” plugin. There are multiple Stripe plugins available, but for Stripe Connect, you may need to use the “Stripe.js” plugin by Copilot, which provides extensive functionalities for Stripe Connect.
- Click the “Install” button to add the Stripe plugin to your application.
4. Configure the Stripe Plugin
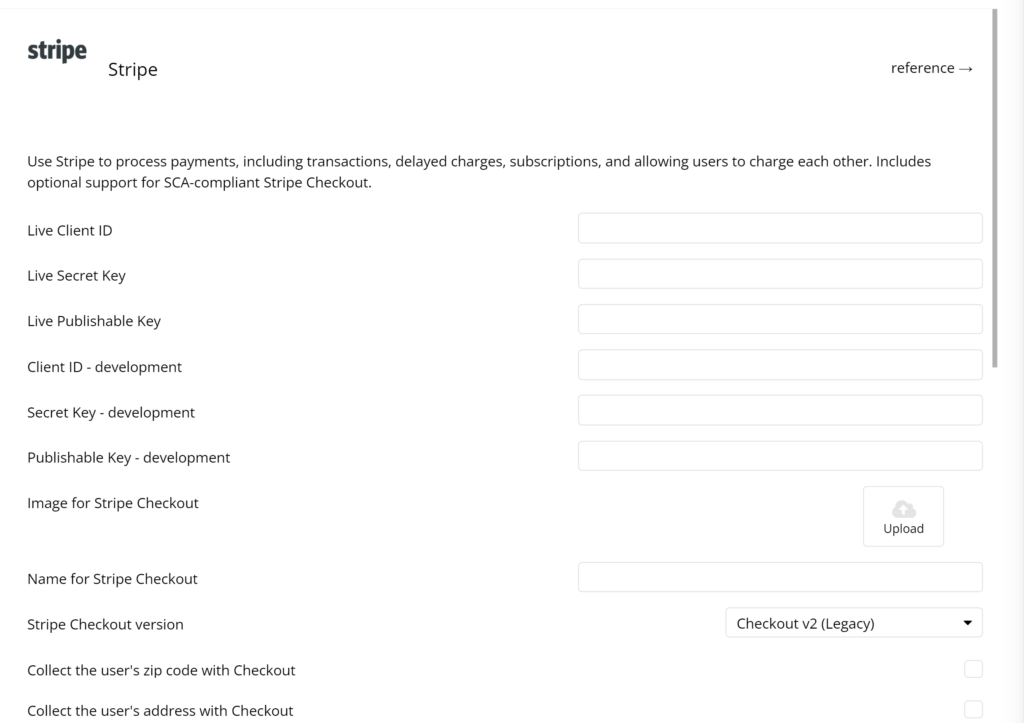
- After installing the plugin, go to the plugin settings and enter your Stripe API keys. You can find these keys in the API section of your Stripe Dashboard. Make sure to use the correct keys for test and live environments.
- For Stripe Connect, you will also need your Stripe Connect client ID. This can be found in the Connect settings of your Stripe Dashboard.
5. Create a Connect Account Setup Workflow
- Create a page where users can sign up and connect their Stripe account.
- Place a button on the page labeled “Connect with Stripe” or similar.
- Set up a workflow for the button. Use the “Stripe.js - Create Account Link” action from the plugin to generate a link that users will follow to connect their Stripe account.
- Stripe.js - Create Account Link
- Set the parameters according to your requirements (e.g., refresh URL, return URL, account type).
- After the account link is created, redirect users to the Stripe onboarding form using the returned URL.
6. Handle Stripe Connect Callback
- After users complete the Stripe Connect onboarding, they will be redirected back to your application. Set up a return URL in your Stripe Connect settings to handle this.
- Create a page in Bubble.io to handle the return URL. This page will receive data from Stripe indicating the success or failure of the onboarding process.
- Set up a workflow on the return page to handle the data. This might involve saving the user’s Stripe account ID to your database.
7. Implement Payment Workflows
- Depending on your use case (e.g., marketplace, platform), set up workflows to handle payments. This could include creating charges, transferring funds, and handling payouts.
- Use the actions provided by the Stripe.js plugin, such as “Create Payment Intent,” “Confirm Payment,” and “Transfer Funds.”
Conclusion
Integrating Stripe Connect with Bubble.io allows you to build powerful applications that can manage payments between multiple parties effortlessly. By following this step-by-step guide, you can set up Stripe Connect, create seamless user workflows, and handle payments securely. With Stripe and Bubble.io, you can focus on growing your platform while providing a robust and reliable payment solution for your users.
Share Article:
Facebook
Twitter
LinkedIn


